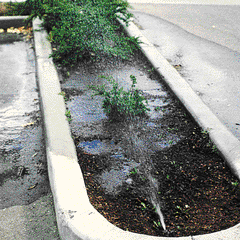

Dry spots: First check the sprinkler heads (the parts that spray water). Clean them if they are clogged. Next check the sprinkler circuit (the group of heads that operate from the same valve). A complete sprinkler system often has many circuits. If the circuit is new and the heads clog repeatedly, flush the circuit by removing the heads. Unscrew the nozzles first, and turn on the valve for a moment to flush out the sprinkler heads. Then remove the sprinkler heads and flush out the entire circuit. Working from the valve outward, toward the end sprinklers, replace the heads one by one while the water is running. This will remove debris from the lines. If the circuit is over 10 years old, and the pipes are galvanized iron, consider replacing them with plastic lines, since they are probably clogged with pipe scale or corrosion. If the heads are covered by foliage, reset them at a greater height by substituting longer risers (the upright pipes that run from the buried lines to the heads above ground). Pruning the plants may also help. If you have done all this and you still have dry patches between the sprinkler heads or at the corners of the planted areas, you may need to replace the heads with others that cover a larger area. Another possible reason for dry spots is inadequate pressure for the number of heads on each circuit. Replace the existing heads with heads that will give full coverage of the area with the lower available pressure. Many manufacturers make low-pressure heads. If none of these steps solves the problem, you may have to rebuild the circuit. Sometimes several heads can be moved a few inches each to fill in gaps in coverage, or a head can be added to an existing circuit, if the water pressure will permit it. This is usually a matter for professional determination. The last possible step involves splitting a circuit that has too many heads into two or more circuits. Install a new valve for each new circuit, and new pipe from the valve to the sprinkler heads.
Flooding: When water is delivered more rapidly than the soil can absorb it, flooding results. This problem is most common on slopes. Improve the drainage of the soil by one of the methods described in Soil Types, Soil Structure, and Groundwater, or replace the heads with a type that delivers water more slowly. Or turn the circuit on until flooding begins, then turn it off until the water has been absorbed. Repeat this cycle until enough water has been applied, allowing the water to soak in each time. Flooding in one spot is probably caused by a break in the pipe or fittings, especially on PVC plastic or polyethylene systems. Dig up the line, cut out the damaged part cleanly, refit and glue in the new piece of pipe or fitting. Compression couplings can be useful in difficult places, eliminating the need for glue. Pipe breaks at the base of risers are common. Replace the broken fitting and replace the riser with a flexible type to prevent future breakage.
Stuck electric valves on automatic sprinkler systems: If the valve fails to shut off automatically, check the screws holding the valve together. If they are loose, they can allow a pressure leak and activate the valve. If the valve fails to turn on automatically, check the wiring at the clock and the valve. Look for loose or corroded electrical connections, and be sure that all outdoor connections are thoroughly waterproofed. If these steps do not solve your problem, you may need professional help to detect and repair defects in the clock or valve.
Visit Books That Work at http://www.btw.com